Inspirations
PATCHWORK AND QUILTING TUTORIAL:
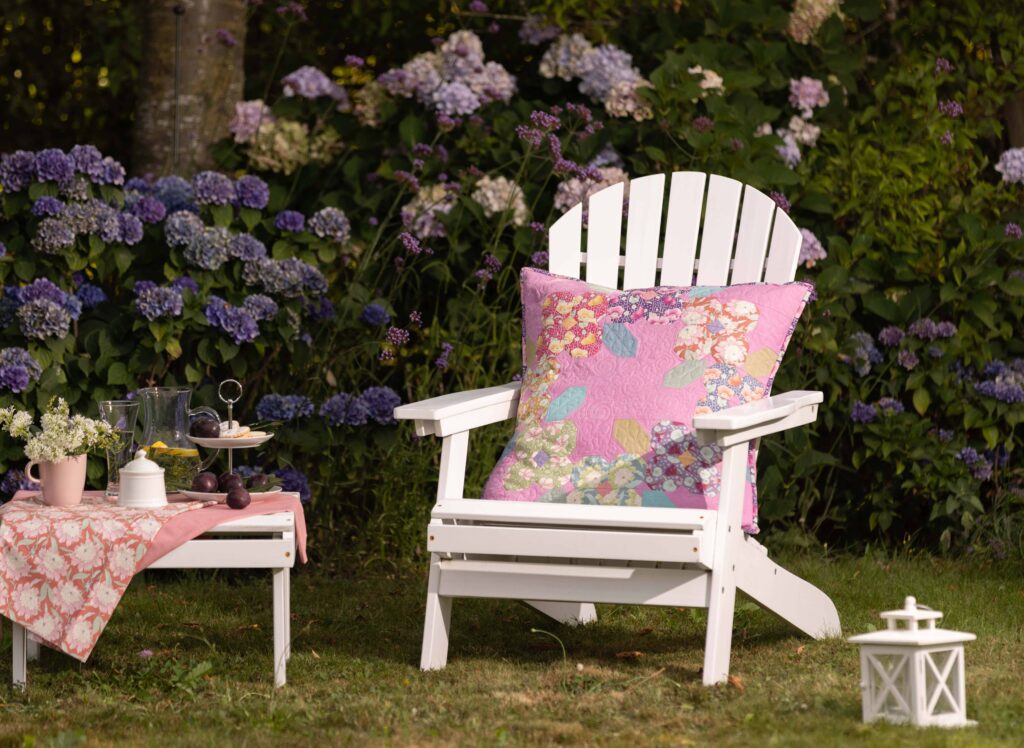
“Colorful Quilting Cushion“
Project execution and preparation of sewing instructions
Atelier Madame Marie
https://www.madamemarie.ch/
Pattern Design : ©Tilda, all rights reserved.
Sewing time: Around 10 hours
Size: 60 x 60 cm (24 ½ inches Square)
![]() MATERIAL
MATERIAL
- 8 different cotton fabrics with floral patterns, each 18 × 18 cm (7 inches square)
- 4 different cotton fabrics plain-coloured red/violet for flower buds, each 10 × 20 cm (4×8 inches)
- 4 different cotton fabrics plain-coloured green tones for leaves each 18 × 18 cm (7 inches square)
- 1 m cotton fabric plain-coloured pink (1 yard)
- 70 × 70 cm volume fleece (27 inche square piece of batting)
- 70 × 70 cm light cotton fabric plain-colour – back quilt top (Back Fabric: two pieces 17 x 24 ½ inches)
- Sewing and quilting threads
- Rotary cutter, ruler, and cutting mat
- Cushion inlet (24“ square pillow insert)
![]() MACHINE AND ACCESSORIES
MACHINE AND ACCESSORIES
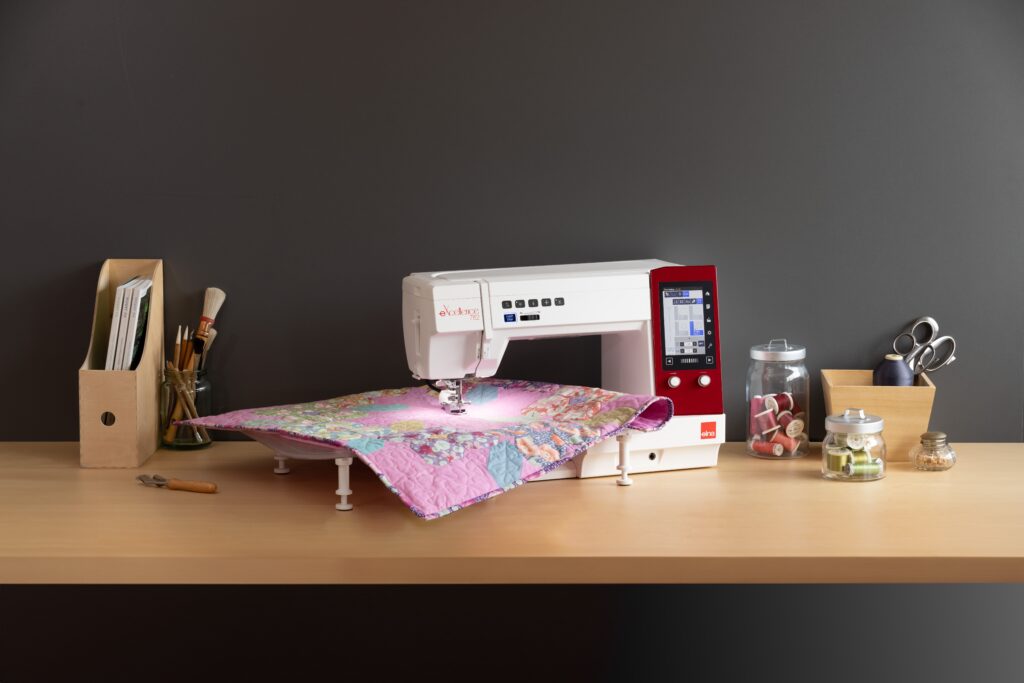
- Computerized sewing machine elna eXcellence 782 is used and recommended for this tutorial.
- Standard foot A
- ¼” seam foot O
- Accurate Stitch Regulator A.S.R. with Free-motion quilting closed-toe foot QC.
The device and foot QC, along with other 3 special ASR feet, are standard accessories with this sewing machine model.

![]() CUTTING INSTRUCTIONS
CUTTING INSTRUCTIONS
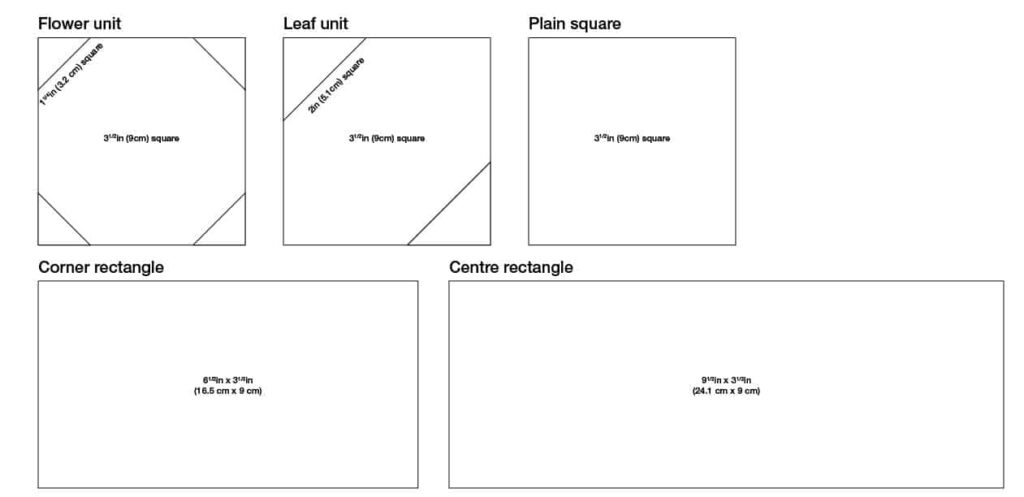
From the 8 different flower fabrics 4 squares of 9 cm each (= 32 squares) (3 ½ inch squares).
- From the 4 different shades of plain-coloured green, 3 squares of 9 cm each (= 12 squares) (3 ½ inch squares)
- From the cotton fabric plain-coloured pink:
6 squares of 9 cm (3 ½ inches)
4 rectangles measuring 16.5 × 9 cm (corner pieces) (6 ½ in x 3 ½ in)
2 rectangles measuring 24 × 9 cm (center pieces) (9 ½ in x 3 ½ in) (center)
24 squares of 5 cm (Twenty-four 2 inch squares)
104 squares of 3.5 cm (1 ¼ inches square)
2 rectangles 45 × 61 cm (back pieces) 17 x 24 ½ inches)
3 strips of 6 × 110 cm (binding tape) (2 ½ inches by width of fabric (WOF) - From the 3 different plain red/purple 8 squares of 3.5 cm each (= 24 squares) (1 ¼ inches)
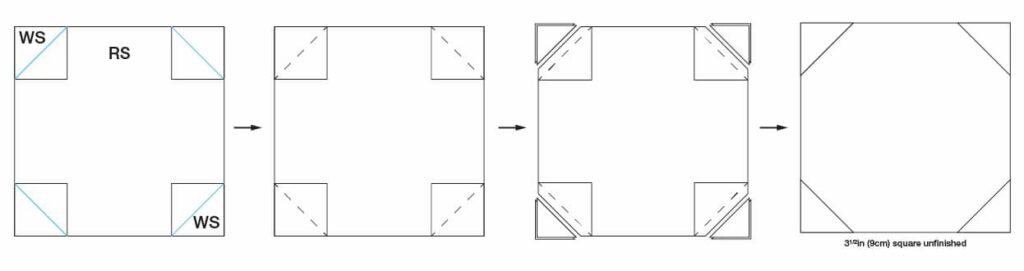
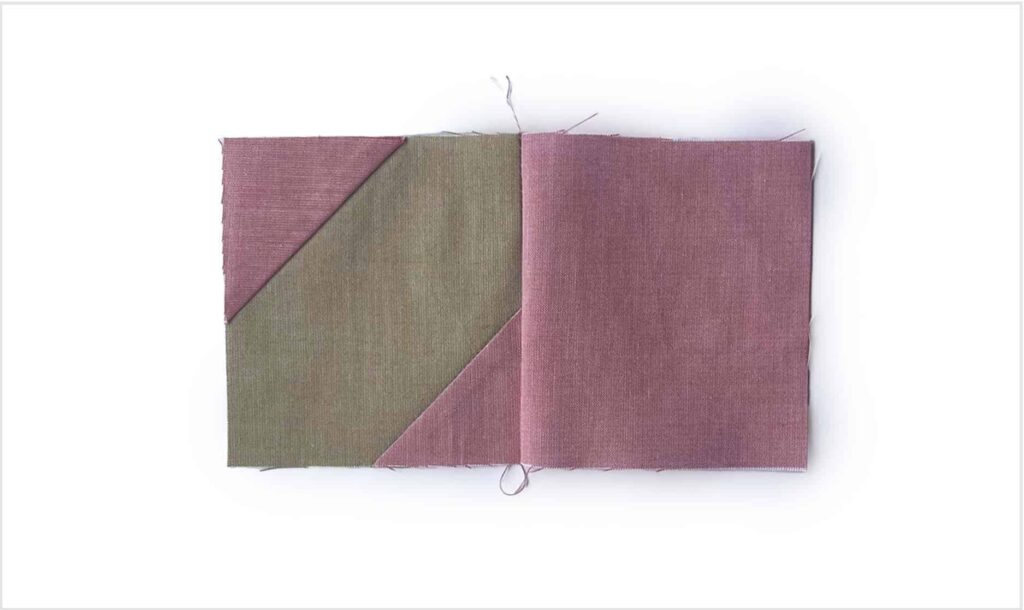
![]() MAKING THE BLOCKS – FLOWERS
MAKING THE BLOCKS – FLOWERS
Place 1 square of floral fabric measuring 9 cm (3 ½ inches) in front of you and place 3 squares of plain-colored pink and 1 square for the bud in each corner, with the fabrics right sides together.
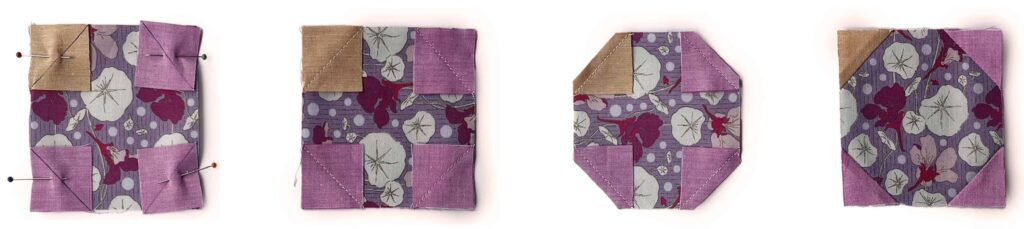
For the small squares, mark a diagonal line with a pen.
Sew along the diagonal line.
Cut the corners back to approx. 5 mm.
Fold over the corners and iron them so that you once again have a 9 cm (3 ½ inch) square.
Proceed in the same way for all other flower squares (32 in total).
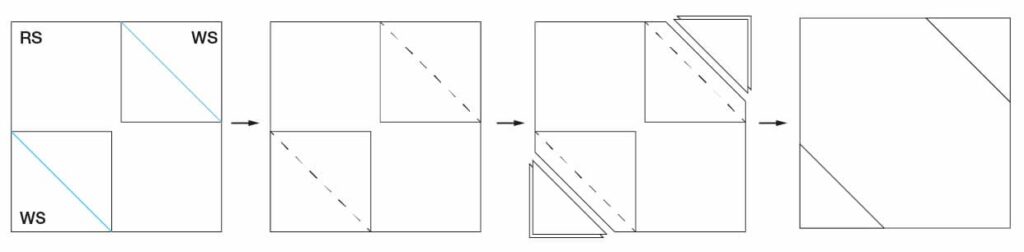
![]() MAKING THE BLOCKS – LEAVES
MAKING THE BLOCKS – LEAVES
Proceed in the same way as for the flowers, but place 2 squares in plain-coloured pink (5 cm) in each of the opposite corners.
Sew along the diagonal marked line.
Cut the sewn corners back to 5 mm.
Fold over the corners and iron them so that you once again have a 9 cm (3 ½ inch) square in front of you.
Proceed in the same way for all leaf squares (12 squares).
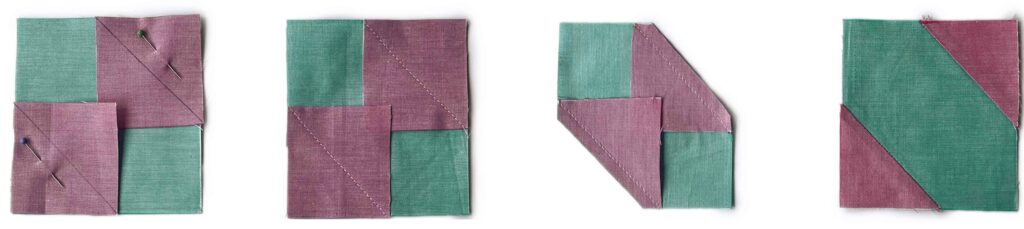
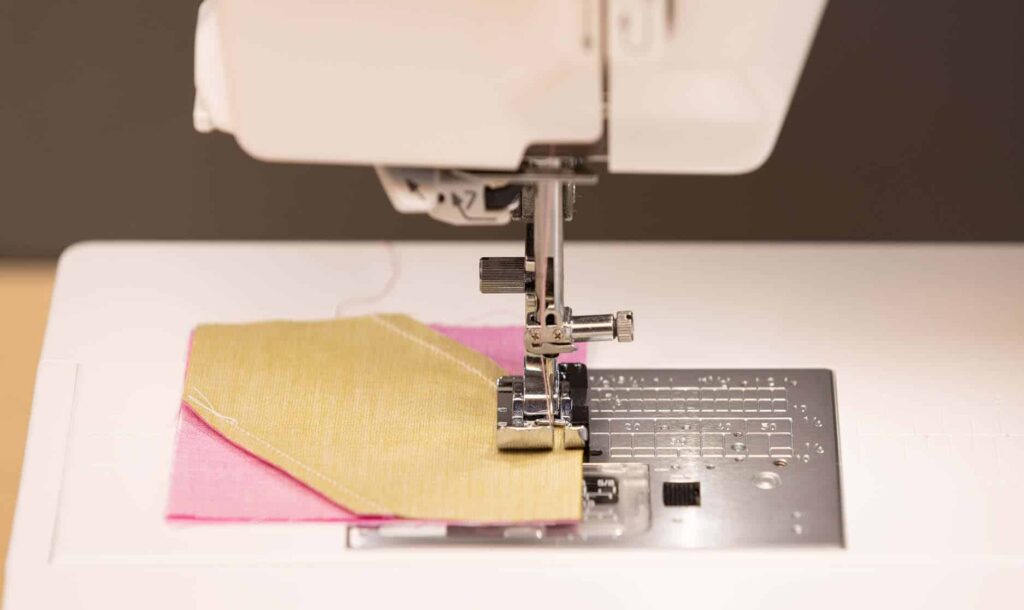
![]() SEWING BLOCKS TOGETHER
SEWING BLOCKS TOGETHER
1.
Put the different squares and rectangles together according to the image.
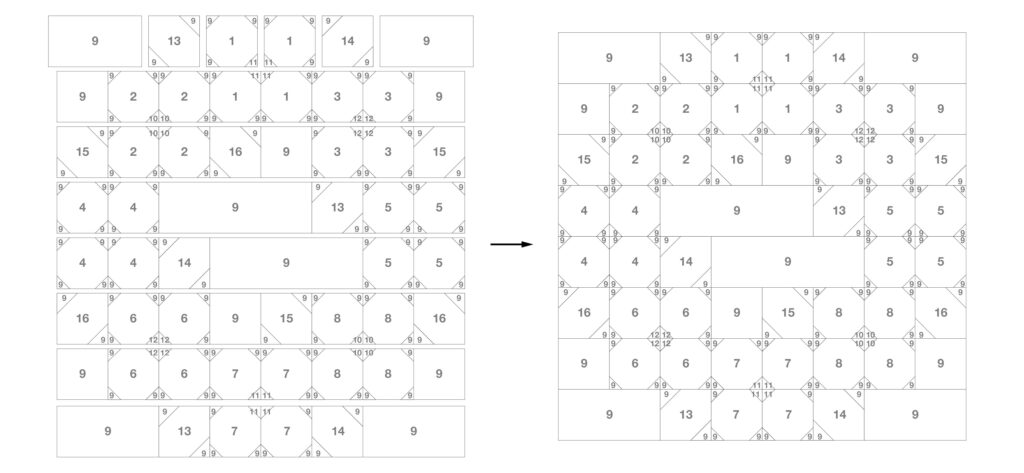
2.
Sew the blocks together row by row, attaching the 1/4 seam foot O and setting your machine to a ¼ seam allowance.
3.
Then sew the resulting strips together so that you reach the size of the cushion.
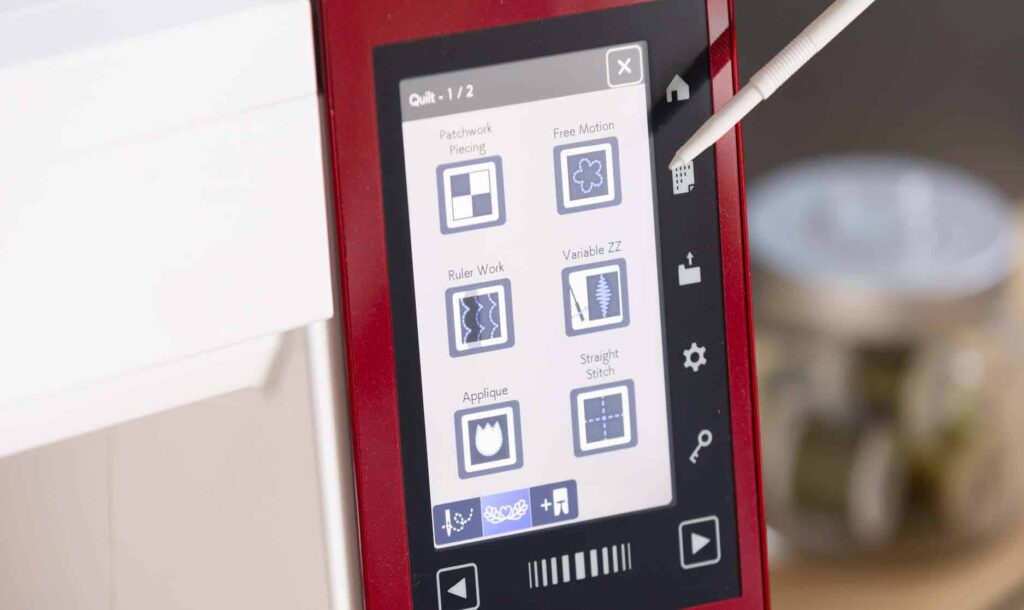
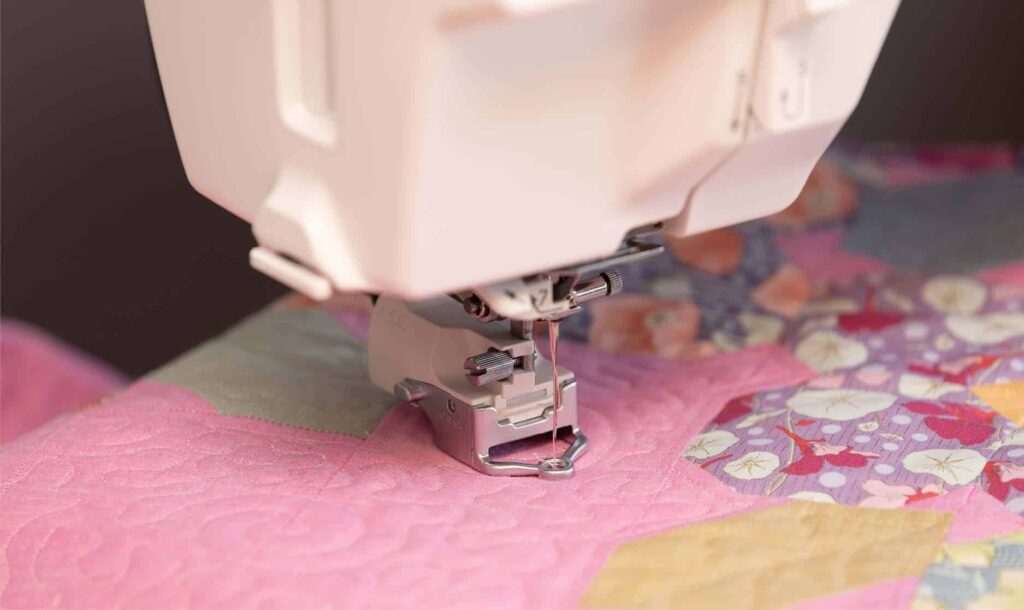
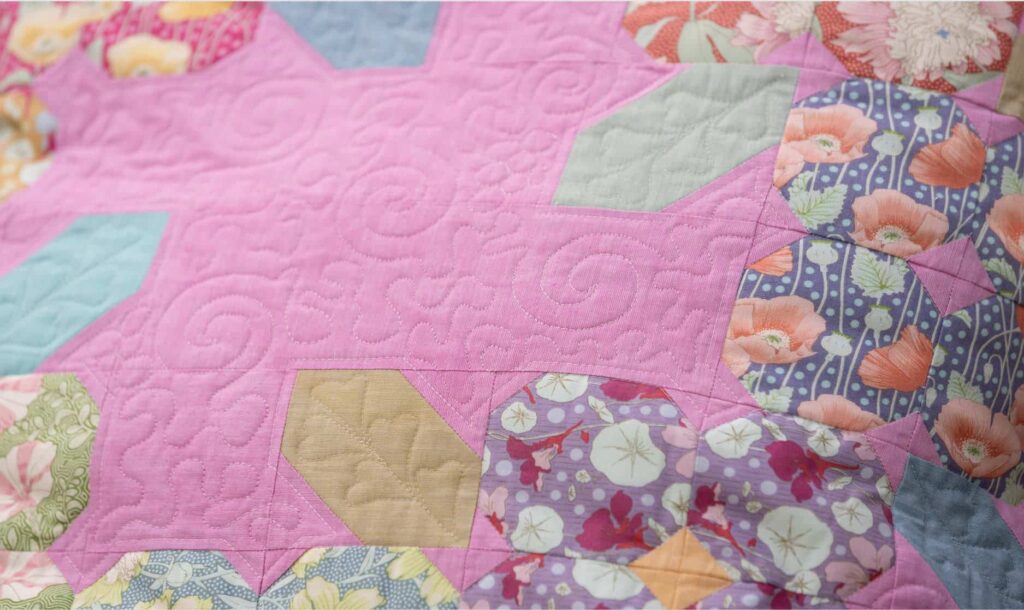
![]() FREE MOTION QUILTING
FREE MOTION QUILTING
1.
Prepare the patchwork piece for free-motion quilting.
Set the machine for use of the Accurate Stitch Regulator in order to facilitate free motion work and achieve regular and precise stitching.
- Attach the ASR with the selected ASR foot.
- Press “Free Motion”.
- Press “Straight Stitch 3”, “Straight Stitch 4” or “Zigzag Stitch 2”. Then press the A.S.R. key.
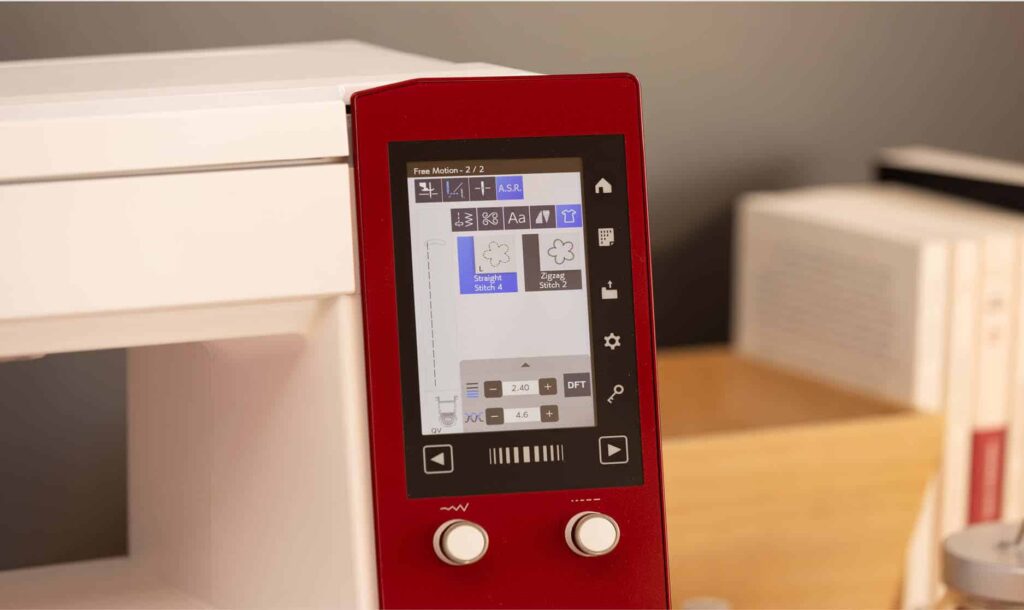
2.
Create a sandwich with the patchwork top, batting and a light cotton fabric as the quilt backing.
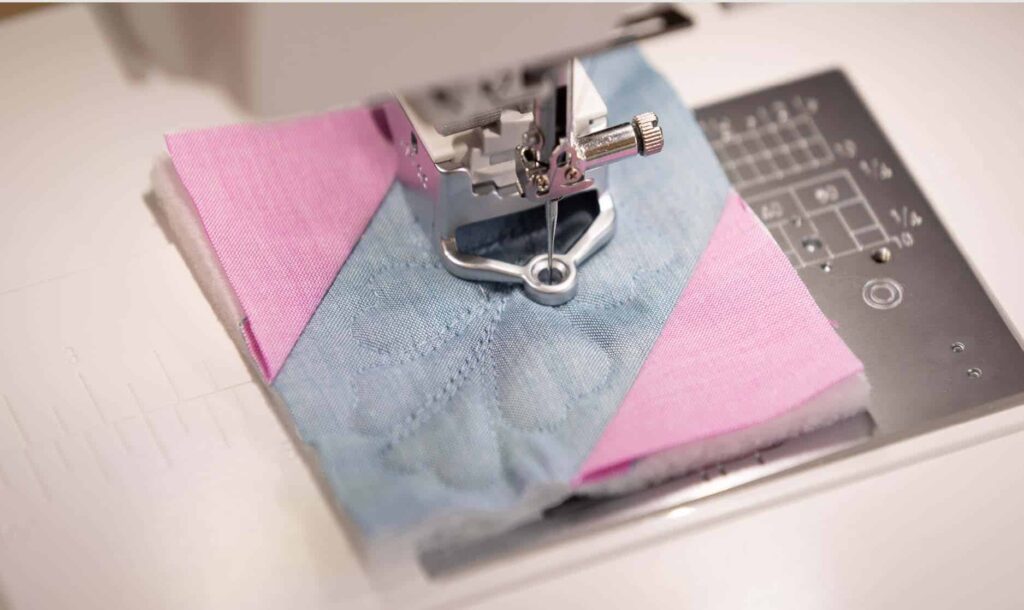
3.
Quilt a pattern to your liking using the free motion quilting foot of your choice.
For this tutorial, we used the Accurate Stitch Regulator with the special closed-toe foot ASR-QC.
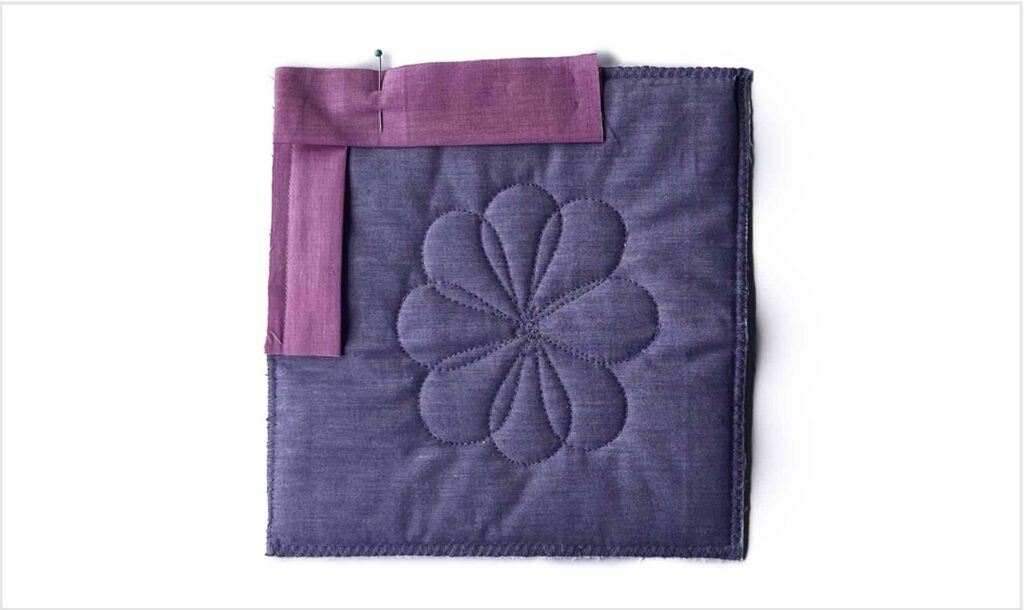
![]() BACK CUSHION
BACK CUSHION
- For the back of the cushion, prepare both of the rectangles of plain-colored pink. Sew a hem on the longer side, folding the fabric over twice on the left side by 1.5 cm (1/2 inch) and top-stitching from the right side.
- Place both of the hemmed rectangles on top of each other, overlapping left to right, so that the open edges lie exactly on the quilt top (right side up). Sew all around using a ¼ inch seam allowance.
![]() CUSHION BINDING
CUSHION BINDING
- For the binding, sew the cut strips (5 cm, 2 ½ inches, wide) of plain-colored pink together and fold lengthwise in the center.
- Top-stitch the folded strip with the raw edges along the edge of the patchwork piece (front) with a seam allowance of 6 mm (1/4 inch).
- Stop in the corners 6 mm (1/4 inch) from the end and sew.
- Then turn the quilt into position for sewing the next side. Fold the strip up first, then down again and top-stitch that side.
- Do the same with the remaining corners.
- Finally, connect the beginning and end together and stitch them onto the quilt.
- Fold the ribbon around the edge onto the back and stitch in place by hand or using a machine.

You have just completed your cushion, congratulations !
© Elna International Corp. SA, all rights reserved
Copyright
The authorization to use this documentation is hereby granted exclusively for non-commercial use. The contents of this documentation are the sole property of Elna International Corp. SA. This documentation shall not in any way constitute a right to transfer any rights with respect to copyrights of Elna International Corp. SA to the user or to third parties.